Making the cut
2014-03-26T00:15:47+11:00
In the coming months it will be time to start thinking about pruning. Phil Dudman takes you through the process for citrus trees.
Unlike other popular fruit trees such as apples and peaches, citrus don’t require a highly thought-out pruning technique in order to maximise production. In fact, some say that citrus trees don’t need to be pruned at all. To a certain extent, that’s true; if you never prune your citrus, they will continue to produce fruit. The problem is that over time your trees will grow too big, making it difficult to harvest fruit and treat the plant for pests and diseases.
In many cases, the rate of fruit production drops off when citrus trees become overgrown, tired and poorly managed. Eventually, you are left with no other option than to give the trees an almighty chop. That’s okay, but it means you have to forfeit a crop for a year or two while the tree canopy regenerates. A better approach is to prune your citrus regularly – at least once a year when established. This will keep your trees healthy, compact and in constant production for many years.
When to prune
In warm frost-free zones, the best time to prune is from late winter to early spring, immediately after harvest. That’s when the flowers that will produce next season’s crop are appearing, so it enables you to decide with ease what growth you should retain.
In cool frost-prone areas, hold off until mid to late-spring when the risk of frost has passed. That way you avoid exposing the resulting new growth to frost damage.
Pruning an established tree
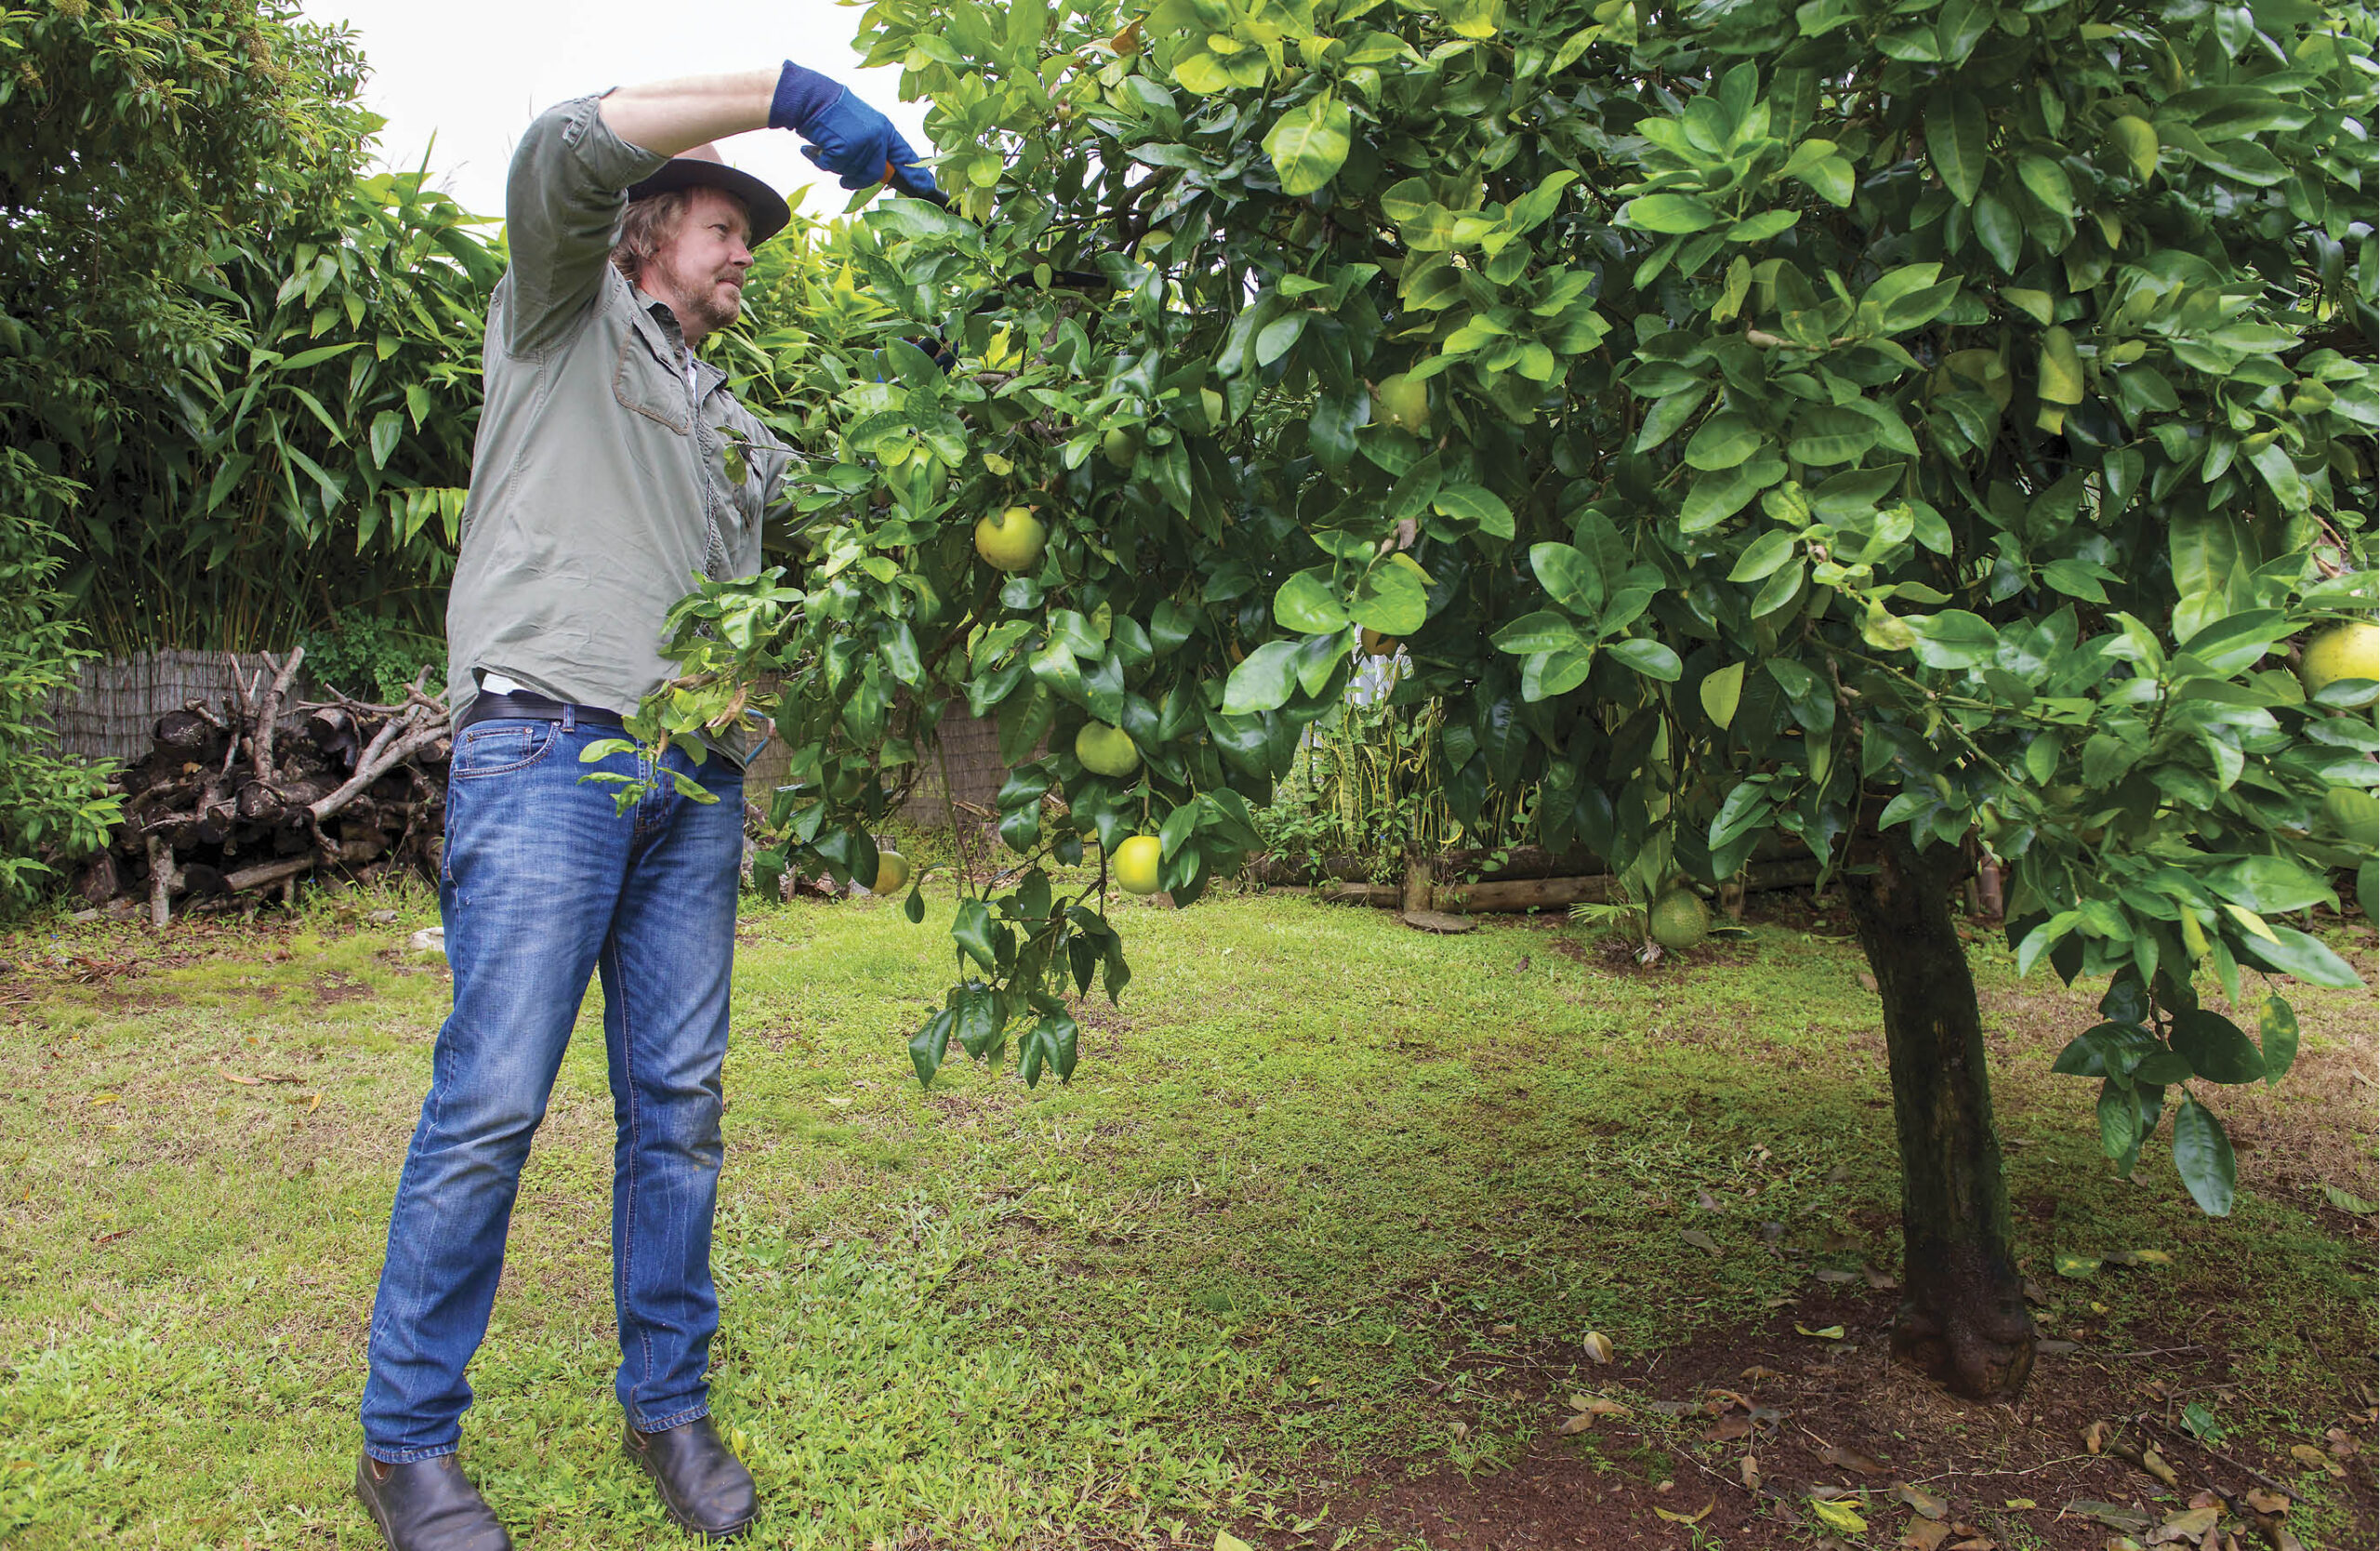
The major fruiting sites on a citrus tree tend to occur on the outer reaches of the canopy. If you give the tree an all-over haircut, you will remove all of the fruiting sites, literally sabotaging your next crop. A more practical approach is one that was introduced to me by citrus expert Peter Young from Birdwood Nursery in Queensland. The aim is to selectively remove just 20 per cent of the canopy each year, leaving 80 per cent of the fruiting sites intact. Any wood that is pruned in a given year returns to production in the following year. Over five or so years, it is possible to have pruned the entire canopy without ever sacrificing a crop. In addition, this annual selective pruning ensures that the tree maintains its vigour, continually producing lots of fresh growth and fruiting sites. See photos 1-4 for how to do it.
When choosing what to prune each year, always focus on the longest and most offending branches. These will be individual branches that impinge beyond the desired size or shape of the canopy. Include branches that hang over pathways or impact on surrounding plants. Tall upward-growing branches can also be cut back to keep the canopy to a manageable height.
At the lower end of the canopy, it’s important to ‘lift’ or trim any branches that are touching – or almost touching – the soil (referred to as ‘skirting’). Over time, these form a thick blanket of foliage which can prevent air movement through the canopy, leading to an increase in fungal problems.
Fruit that forms on these low branches are also more susceptible to disease due to increased moisture and fungal activity close to the ground. Prune this low growth to lift the ‘skirt’ to around 1m high. You do not need to make cuts at any specific points on the branch, you just need to ensure they are clean with no ragged edges.
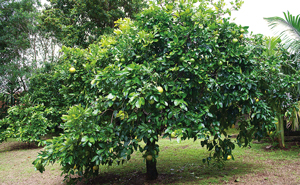
1. An established tree in need of reshaping |
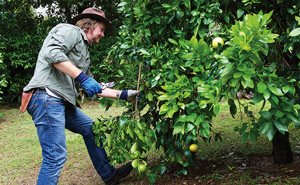
2. Remove long side branches that |
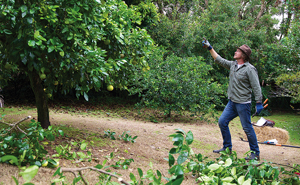
3. Stand back regularly to assess |
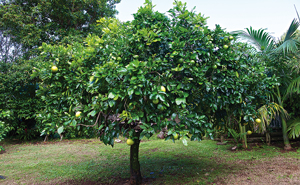
4. Shaping complete |
Pruning for health
Once the desired shape and size of the canopy is restored, look over the outer foliage for any unusual swellings in the stems. These are most likely to be the result of the pest citrus gall wasp. The adult wasps lay eggs in the new stems, and galls form as the larvae develop. It’s important to remove these galls before the end of August. That’s when the next generation of wasps will hatch and reinfect your tree. Prune them off and burn them, or seal them in a plastic bag and put them in the bin.
If you see tiny pinholes on the galls, then it’s too late; the wasps have already emerged. There’s no need to remove these particular galls unless they show secondary symptoms such as peeling bark or rotting.
Finally, examine the inner branches of the tree and prune out any dead, damaged and diseased wood, as they are useless and only serve as a breeding ground for unwanted pests and diseases. Also, thin out any heavily congested branches, particularly those that are crossing and rubbing one another. Over time, the bark at these sites will wear away, exposing the inner wood to pest and disease attack and potentially causing dieback.
Training a young tree
The aim in training a young citrus tree is to establish a good shape and encourage the most productive wood. As the tree grows, remove crossing and tangled branches to help create a framework of evenly spaced, outward-growing branches. Beware of overly vigorous upward growths known as watershoots. These absorb a lot of the plant’s energy, but produce very little fruit. Cut these back hard. Always encourage slower-growing horizontal branches and side shoots, because they provide the best fruiting wood.
Similarly, pinch off any growth (known as ‘suckers’) below the graft as soon as they appear. If you have lots of fruit developing in the first two to three years, thin them out to allow the young tree to focus its energy on establishing a strong canopy and root system.
Reviving an old tree
If you have an old, rangy or overgrown citrus tree that is unproductive and generally of poor health, it is possible to reshape the tree and bring it back into full production using a severe pruning technique called ‘skeletonising’. This removes all of the entangled branches and twigs, including unproductive, dead and diseased wood, leaving just a single trunk – about 1-1.5m tall – and a skeleton of healthy, evenly spaced branch stumps.
It takes one to two years for the new canopy to fully develop, after which you will start to see a return to full production.
Very soon, the bare stumps respond with a flush of healthy growth, forming a dense new canopy. It literally liberates a tired old tree, giving it a new lease on life. However, if you live in a frost-prone area, don’t prune until after the risk of frost has passed (late spring) to avoid seriously damaging the new growth.
Dismantling a big old tree requires care so you don’t hurt yourself, the tree or surrounding structures. Large branches carry a lot of weight so remove them in small sections at a time.
Always use a sharp pruning saw when dealing with thicker branches. Make a lower or undercut first, at least one-third of the way into the branch, then move outwards at a distance of about one to two times the thickness of the branch to make your top cut. This allows a lateral branch to fall without the bark ripping down the trunk, creating a huge wound (see photos on page 40).
Using a similar technique on vertical branches enables you to put down the saw and use two hands to physically snap the pruned section away. Once the bulk of each branch has been removed you can easily handle the remaining stub and finish it off with a clean cut.
Stubs from unwanted side branches, as well as branches that are lower down on the trunk, should be cut back hard to the trunk or corresponding leading branch, otherwise they will reshoot in unwanted places.
The place to make your final cut is just beyond the branch ‘collar’, a section of slightly raised bark at the base of the branch. This is where the tree will naturally form a callus over the exposed cut, protecting the inner wood from the elements. Sometimes it is difficult to see the branch collar, but you can usually detect it by feeling around the base of the branch.
Some experts recommend applying a commercial wound dressing or acrylic paint to the cuts to stop the surface drying; others claim that this can do more harm than good, so it’s up to you. What is important is that you paint the newly exposed trunk to protect the bark from sunburn and splitting. It’s traditional to use a lime-based whitewash made from hydrated lime, water and oil.
Alternatively, you can mix water and acrylic paint at a 50:50 ratio (an interior flat paint is the best type to use because it allows the bark to breathe). Before you apply your wash, gently scrub the bark with an old brush and water to remove any dirt, moss and lichens.
It takes one to two years for the new canopy to fully develop, after which you will start to see a return to full production. Some of the regrowth may shoot straight upwards, becoming long whippy branches. There’s no need to prune these off as the weight of their fruit will eventually force the branches to weep downwards, creating a lower, more desirable dome-shaped tree. If you think some of these branches do need a little help, you can attach weights to their ends to encourage them to hang down.
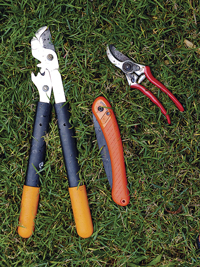
ESSENTIAL TOOLS
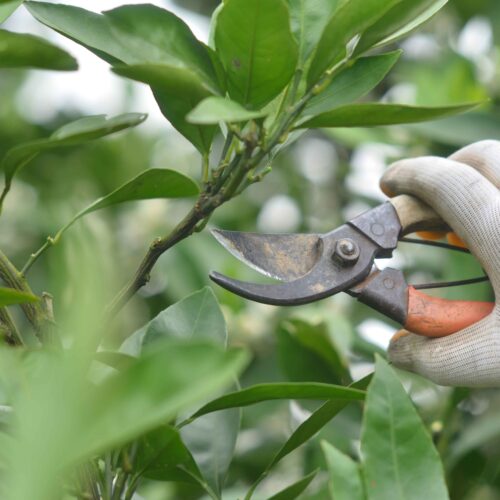
- Secateurs: For pruning light material up to 10mm in diameter. Must be strong, sturdy, clean and sharp. Choose a quality pair with replaceable blades.
- Long-handled loppers: For cutting branches 10mm to 40mm in diameter. Also handy for internal and external cuts that are more difficult to reach.
- Pruning saw: For cutting thick branches. Teeth are designed to cut on the pull stroke. Fold-up types fit safely and comfortably in your pocket.
- Extendable pruner with saw attachment: Perfect for lopping vertical growth at the top of the canopy without the need for a ladder.
TOP TIP
Hygiene
Diseases are easily transferred, so it’s important to clean and sterilise cutting equipment immediately after pruning diseased material. Use a strong bleach or 10 per cent methylated spirit-water solution to thoroughly clean all surfaces, then rinse with tap water.
This article, which appeared in the July/August 2013 issue of ABC Organic Gardener magazine, won author PHIL DUDMAN a “Paper Laurel for Journalism”, at the 2014 HMAA Laurel Awards.




-500x500.jpg)