Black garlic
2016-11-30T21:00:00+11:00
It's not hard to make black garlic says PENNY WOODWARD, so give it a go following her helpful instructions.
Black garlic is a delicious and fascinating ingredient, but it’s not a different cultivar or type of garlic, so what is it?
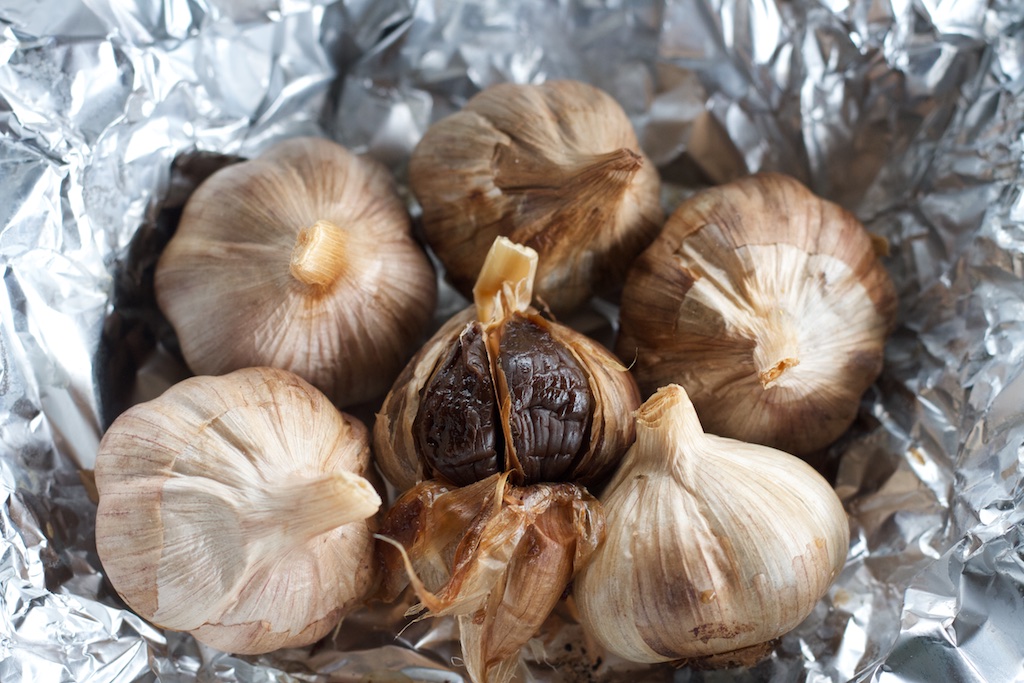
Black garlic is sometimes described as fermented garlic but it is actually made from standard garlic bulbs, slowly cooked until the cloves are black and almost treacly. Some passionate garlic people would actually say it is not garlic at all because the taste is so totally different. The flavour has been variously described as moist licorice, balsamic vinegar, richly umami, sweet and savoury, garlicky prunes, sweet and syrupy, tamarind, dark caramel, bitter and sweet. The answer is probably that you need to taste it yourself and decide.
The chemistry of black garlic
To understand what actually happens when making black garlic, then read this paragraph. If you want to just know how to do it, then skip this and go to the following paragraph. There are no bacteria or micro-organisms involved in making black garlic. It is actually produced by a form of slow cooking: a low, slow roast that involves a gradual breakdown of sugars over time. It is partly the heat denaturing the enzyme allinase and partly a Maillard reaction that causes a stream of chemical changes, producing dark brown and black clove colours, and the complex, sulphurous caramelised flavour. The Maillard reaction is a chemical reaction between an amino acid and a reducing sugar, usually requiring heat, and is a form of non-enzymatic browning (Block, E., 2010).
How to make black garlic
It’s relatively easy to produce at home with a little patience and a bit more electricity. The essence is slow cooking in a fairly airtight container that retains moisture, at a steady temperature of about 60°C for 30 to 40 days (that is not a typo!). It can be done in an electric rice cooker, slow cooker or electric dehydrator (as long as you can seal in moisture) or equivalent.
Select good-quality garlic bulbs (no mouldy or damaged cloves), remove any loose skin but leave the bulb wrappers intact and moisten the outside of each bulb with water. Wrap 6 or 7 bulbs together in two layers of aluminium foil so they are well sealed. Repeat if you have more bulbs. If you are using a rice cooker, make sure you have one with a ‘keep warm’ setting that doesn’t automatically switch off, and plug up any steam holes so that the moisture doesn’t escape. Sit the wrapped bulbs in a container so they are not actually touching the bottom of the bowl. (I use a colander with small feet.) Put the lid on and turn to warm if you are using a rice cooker, or set to 60°C for a dehydrator.
Now be patient because you really do need to wait for 30 days. After that time has passed, unwrap them. The bulb and clove skins will be a sort of dirty, grey-brown. To see if it is properly cooked, peel a clove. If it is not yet black and soft, put it back in for another 5 to 10 days. The blacker the cloves, the sweeter they are, with less of the true bitey, garlicky flavour. The bulbs should be moist and soft, not dry.
Once the cloves are black and treacly, remove them from the cooker and now leave the skins to dry out in a warm and dry but shaded position. Once the skins are dried they are ready to eat or store. The bulbs will keep for months in a sealed container in the fridge.
Using black garlic
Peel the cloves and try just eating one or two on toast; or purée a few with the juices left over from roasting beef or lamb, and serve alongside. They also combine well with scrambled eggs, pasta and risotto, or you can slice and add them to pizza. Alternatively, serve a few cloves with fish, grilled chicken or pan-fried gnocchi. Black garlic is also used in desserts, and even with chocolate. Don’t use too much, it’s the nuance that’s important.
For much more on growing, harvesting, curing and storing garlic, plus different varieties to try, don’t miss Issue 92 ABC Organic Gardener. Out Now!


