July is for bed building
2015-06-30T04:51:59+10:00
JUSTIN RUSSELL says, “now is the hour for all good gardeners to build a bed”!
July is a funny old month in my garden. The average temperature for the month ranges between a minimum of 5 degrees and a maximum of 16, which is probably considered tropical bliss by my hardy southern friends but is well and truly cool enough to slow gardening activity to a crawl. The upside to July in the high country of south east Queensland is that it’s leading into our driest period of the year. This means we get lots of cold mornings and gloriously sunny days, the kind of days that are perfect for outside jobs.
See the dilemma? It’s cold, but not cold or wet enough to completely put the garden on ice. What’s a bloke to do? Well, in dryish climates across eastern, central, western and northern Australia, in all but the coldest areas, it’s traditionally the perfect time to make beds.
I’m not talking about the kind of beds you lie in, as much as I love a nap on a cold winter’s afternoon. I’m talking garden beds, and more specifically, the kind of rich, productive beds used to grow food.
In recent years high raised beds have become very popular with home gardeners. These have their place, especially when making beds over a solid base, to deal with contaminated urban soil, and for gardeners with mobility issues, but they take lots of soil to fill, are difficult to dig, and unless a water reservoir is contained in the base, can be quick to dry out. I’m a “minimal till” kind of gardener, so my favourite beds are low (about 200mm high) and either contained with untreated hardwood sleepers or simply formed, market garden style, into soil mounds.
If you’re making new beds from scratch, the process is slightly different for each technique. In the case of timber raised beds, you need a clean base to work upon. Kill off any grass and weeds using organic herbicides, or by solarising (using black plastic) or sheet mulching. Then, cut your timber to length and form your beds, joining them securely at the corners using screws, straps, or traditional joinery techniques.
Fill your beds with a mix of soil and organic material. My preferred ratio for general vegie beds consists of about 85 percent real soil (if you can get hold of it – avoid “soil mixes/blends” that tend to not contain any real soil), 10 percent compost, and 5 percent rotted manure or pelletised organic fertiliser. Adjust these ratios as necessary, aiming for an organic matter content of between 10 and 20 percent.
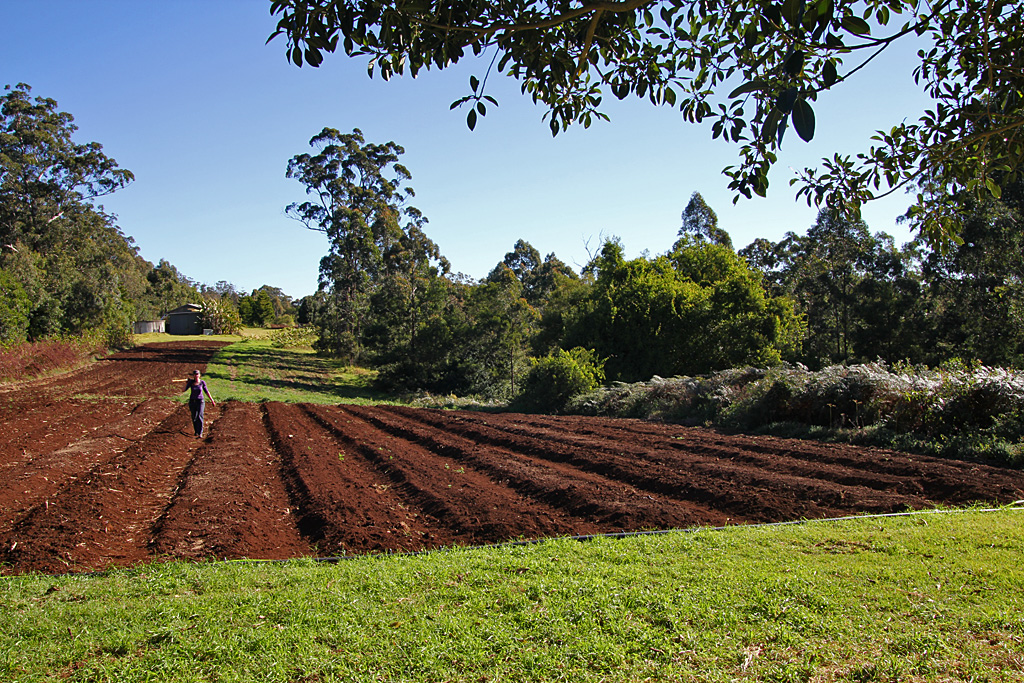
In the case of market garden style beds, the easiest way to prepare the soil is with a rotary hoe or reciprocal spader. These can be hired as a walk behind unit, or as an attachment to a tractor or skid steer loader. Use the rotary hoe to pulverise the soil along with any grass or weeds, which will decompose into organic matter.
Allow the ground to rest for a couple of weeks, then pull out any persistent grass runners and weeds. Once the ground is clean, form your beds by scraping soil from the pathways, and piling it into mounds. Once the beds are about 200mm high and about “straddle width”, i.e. 5-600mm wide, add amendments such as compost and manure*. Fork these lightly through the bed, then level off the surface with a rake. By early spring, you’ll be ready to plant!
Three bed building caveats: First, never work wet soil. You’ll destroy the soil’s structure, so wait until it’s just moist. Second, get a soil test done, or at a bare minimum, test your pH and adjust accordingly. Third be careful what inputs you use to make your beds. Look for clean, weed free soil, use certified organic compost if possible, and avoid using manures that might be contaminated with medicinal residues. Start with a quality bed, and there’s every chance it will produce many kilos worth of nutritious, chemical free vegetables.
*A soil test will list recommended amendments and their specific application rates, but as a rough guide, add one 10L bucket of compost/rotted manure per square metre.


