From lawn to vegies
2011-03-30T09:09:36+11:00
PHIL DUDMAN explains how to dig up a patch of lawn and get started growing nutritious vegies.
You can start an organic vegie garden any time of year, but right now is one of the best. Mild autumn conditions are perfect for working and planting. Although there are advantages to building raised beds, if you want to get stuck straight in, just digging up the lawn is a good option. There’s a fair bit of physical effort needed, but the rewards are fantastic. There are also costs for materials such as soil conditioners, but remember you are setting this garden up for years of vegetable production.
Choose your site
Find an open sunny spot with at least four, but preferably six or more hours of full sun a day – vegies never do well in shade. Good drainage is equally important. Avoid wet boggy areas as they are a recipe for failure. Heavy clay soils will need to be improved and mounded to make them drain more freely. Beware strong winds as they damage plants and dry them out too quickly. Find a protected spot where possible, or create a barrier with say fencing or hay bales, but avoid shading the garden.
Mark out the size of your growing area
The size depends on the space you have and how much you want to grow. Also consider your budget. If funds are tight and you have to buy in animal manure, compost and other fertilisers, then start modestly. You can always expand your garden as you become more experienced and start your own compost system. An area of 10m x 4m is big enough to provide a family of four with a reasonable supply of fresh vegetables throughout the year. Mow the turf if needed and mark out your area (a string line is handy for this).
Get digging
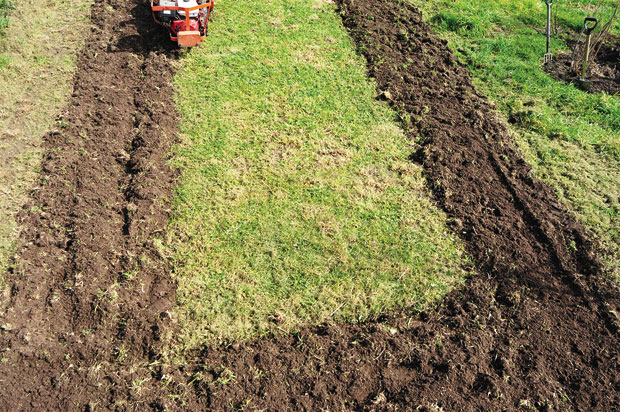
For small patches, use a mattock or spade to dig over the area to a depth of around 30cm (a spade depth). If the area is larger than 10m², consider using a rotary hoe to save your back. It’s still hard work, but it will speed up the process. You can hire them for about $100-$150 per day. Be careful, as overuse will pulverise your soil, destroying its structure. However, you will only be using this machine once to get your garden started. When it comes to the grass, some gardeners prefer to chip it off first, stack it up and compost it. This is advisable with aggressive running grasses like couch and kikuyu. I prefer to just dig it in – like a green manure – and let it rot down in the soil.
Test your soil
An easy and important test to do is to check your soil pH. See ‘What to Do Now’ (on page 65) for more on why and how to maintain the optimum soil pH level. In cases where there is risk of prior soil contamination (eg. along fence lines where chemicals may have been sprayed), it is a good idea to take a sample to a soil-testing laboratory for further investigation. Our ‘Chemical Watch’ story (on page 46) has advice on what to do regarding soil testing. If you are concerned about possible contamination, it might be better to do that soil test before you launch in to digging up the lawn.
Enrich the soil
Spread lots of poultry, sheep, cow or horse manure over the area – or whatever you can get hold of. Make sure it is well-aged manure or it could burn your plants. If it’s fresh, leave it in a heap on the ground for a few weeks to let it settle. Empty your bins of all the compost you have ready (or buy it in) and spread that along with some mushroom compost. You need at least half a wheelbarrow full of this combined manure and compost mix per square metre of garden – even more is better. Then sprinkle fertilisers such as blood and bone at the rate of one good handful per square metre. Fork or rotary hoe all of that in to a spade’s depth.
Shape beds
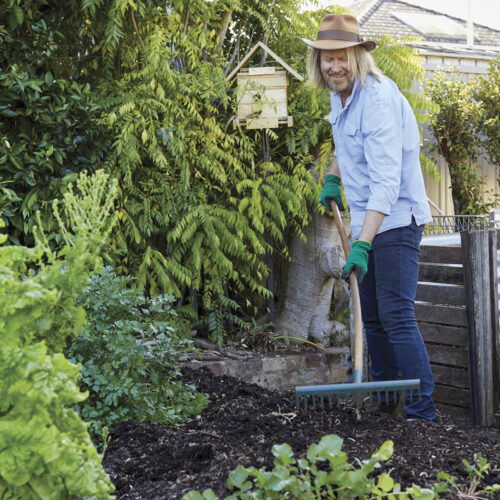
A larger area can be divided into smaller, workable garden beds if needed. I find the ideal width is around 1.2-1.5m. This allows comfortable access into the middle of the beds from both sides. You can use the soil from the pathways you create to build up your garden beds. Mound the soil in the beds by at least 15cm (more is better) to improve drainage. Separate the beds with pathways at least 80cm wide (to allow wheelbarrow access) and cover with sawdust or a fine-grade woody mulch to inhibit weeds. It’s not necessary, but you can surround the beds with a timber edge or an eco-edging product if you have the resources. This will create a tidy finish and help keep weeds and turf out.
Water, mulch and wait
Water the beds deeply and cover them with a 15cm layer of lucerne, sugarcane or similar mulch. Avoid anything that may contain weed seeds. Let the whole lot settle for a week or so, and should any bits of turf sprout up, dig them back in to deny them light.
Start planting!
Make pockets in the mulch then dig down into the soil to plant seedlings, or drag it back in rows and create shallow furrows in the soil to plant seed. Give young seedlings a regular light watering to ensure they don’t dry out. Water more deeply and less regularly as they establish.

